Back to: 7: Finishing: The Optician’s Edge
Note: If your edger is set to “AUTO” and has no reason to run a job on “MANUAL” then you would simply block a progressive lens directly on its fitting cross with the painted reference lines horizontal to the blocker grid.
Just as with lined multi-focals, progressives require shift in both the horizontal and vertical. Progressives ALWAYS use monocular PDs where lined multi-focals (almost) ALWAYS use binocular PDs.
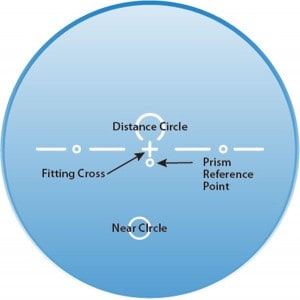
Prism in progressive lenses is ground in at the lab. So, if the lab did the job correctly and you do the layout work correctly, the prism amount will be correct.
Progressives layout work is done from the fitting cross.
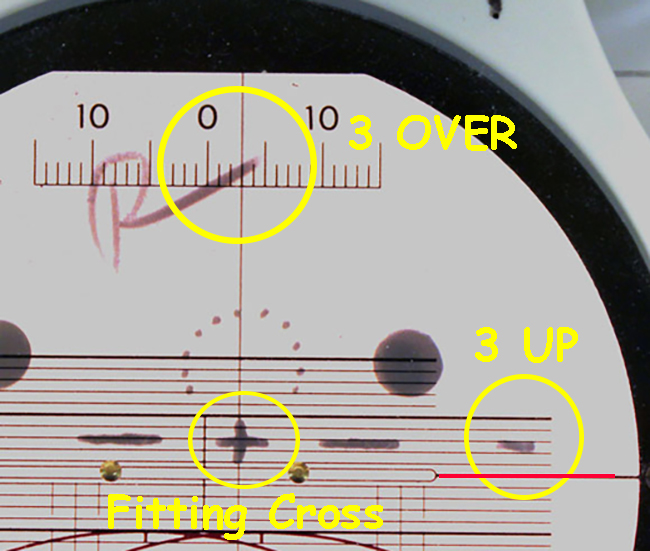
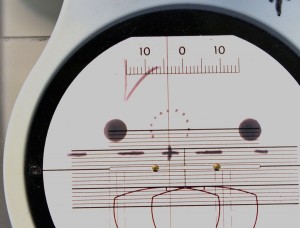
Example for a right Lens:
Frame A = 53
DBL= 19
Frame B = 30
Patient PD = 33/32
Fitting Height = 18
Frame PD 72/2 = 36
36 – 33 = 3 IN
Frame B/ 2 = 15
15 – 18 = -3 or 3 UP
Height of 18 means I would need to move my lens UP 3mm.
Think 3 In 3 Up
Once I have the lenses in this position, I would load the blocker with a block (with a sticky “leap pad” attached) and stick the block to the front of the lens.
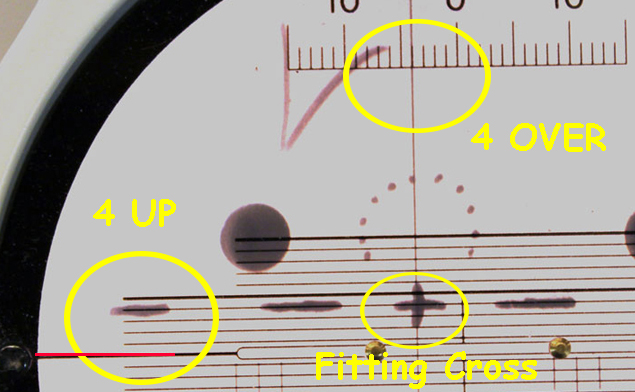
Example for a Left Lens:
Frame A = 53
DBL= 19
Frame B = 30
Patient PD = 33/32
Fitting Height = 19
Frame PD 72/2 = 36
36 – 32 = 4 IN
Frame B/ 2 = 15
15 – 19 = -4 or 4 UP
Height of 19 means I would need to move my lens UP 4mm.
Think 4 In 4 Up